
For my latest home lab project, I am building a Two-Tier Public Key Infrastructure (PKI) to simulate a high-security banking environment.
Today, I established the “Trust Anchor” of the entire network: the Standalone Offline Root CA.
The Architecture Strategy
I designed this Root CA with specific security constraints:
-
Offline Status: It is not joined to the domain. In a real production environment, this server would be physically unplugged (air-gapped) to protect the private keys from network attacks.
-
Standalone Mode: Since it has no AD dependency, it acts purely as the source of truth for the hierarchy.
Installing the Core Role
I started with a fresh installation of Windows Server 2025 (Server Core is preferred for production, but I used Desktop Experience to visualize the management tools).
Using Server Manager, I deployed the Active Directory Certificate Services (AD CS) role. At this stage, the server is just waiting to be told what kind of Authority it will be.
Configuration Install the Role Software
We will use Server Manager for this so you can see exactly what is happening.
-
Open Server Manager.
-
Click Manage (top right) > Add Roles and Features.
-
Click Next until you reach Server Roles.
-
Check the box for Active Directory Certificate Services.
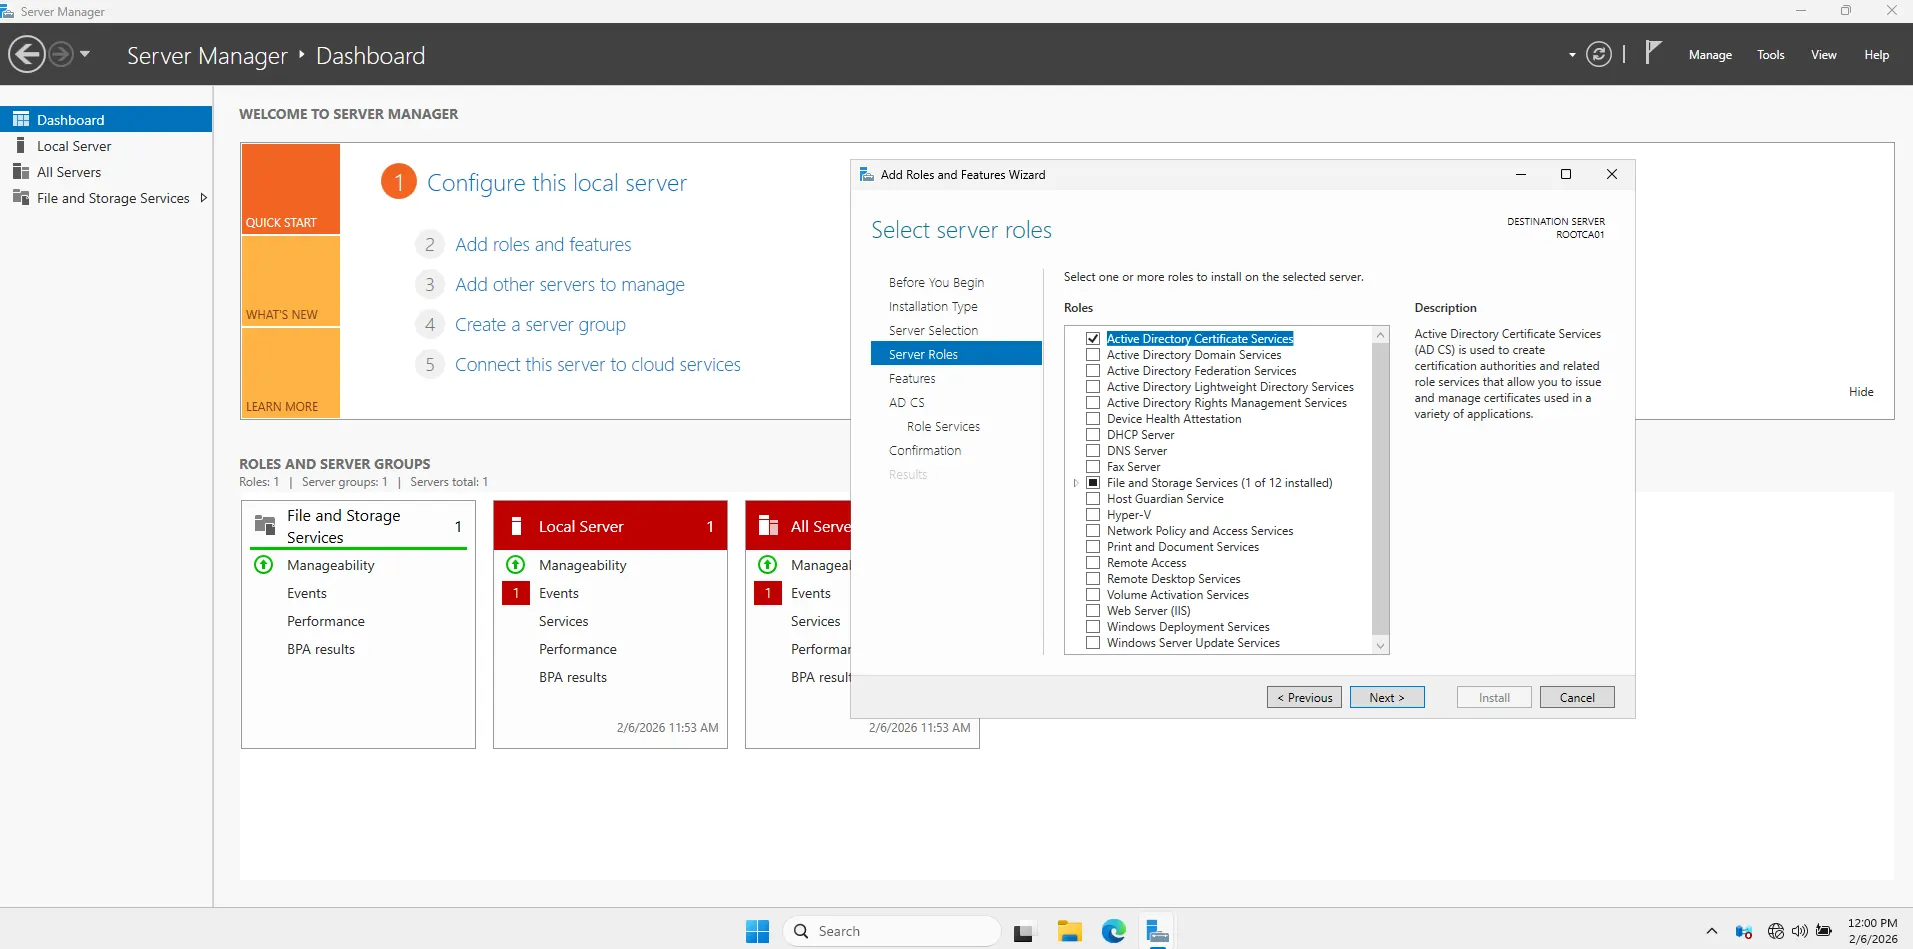
-
Click “Add Features” when the popup appears.
- Click Next through the rest of the wizard.
-
On the Role Services screen, ensure only Certification Authority is checked.
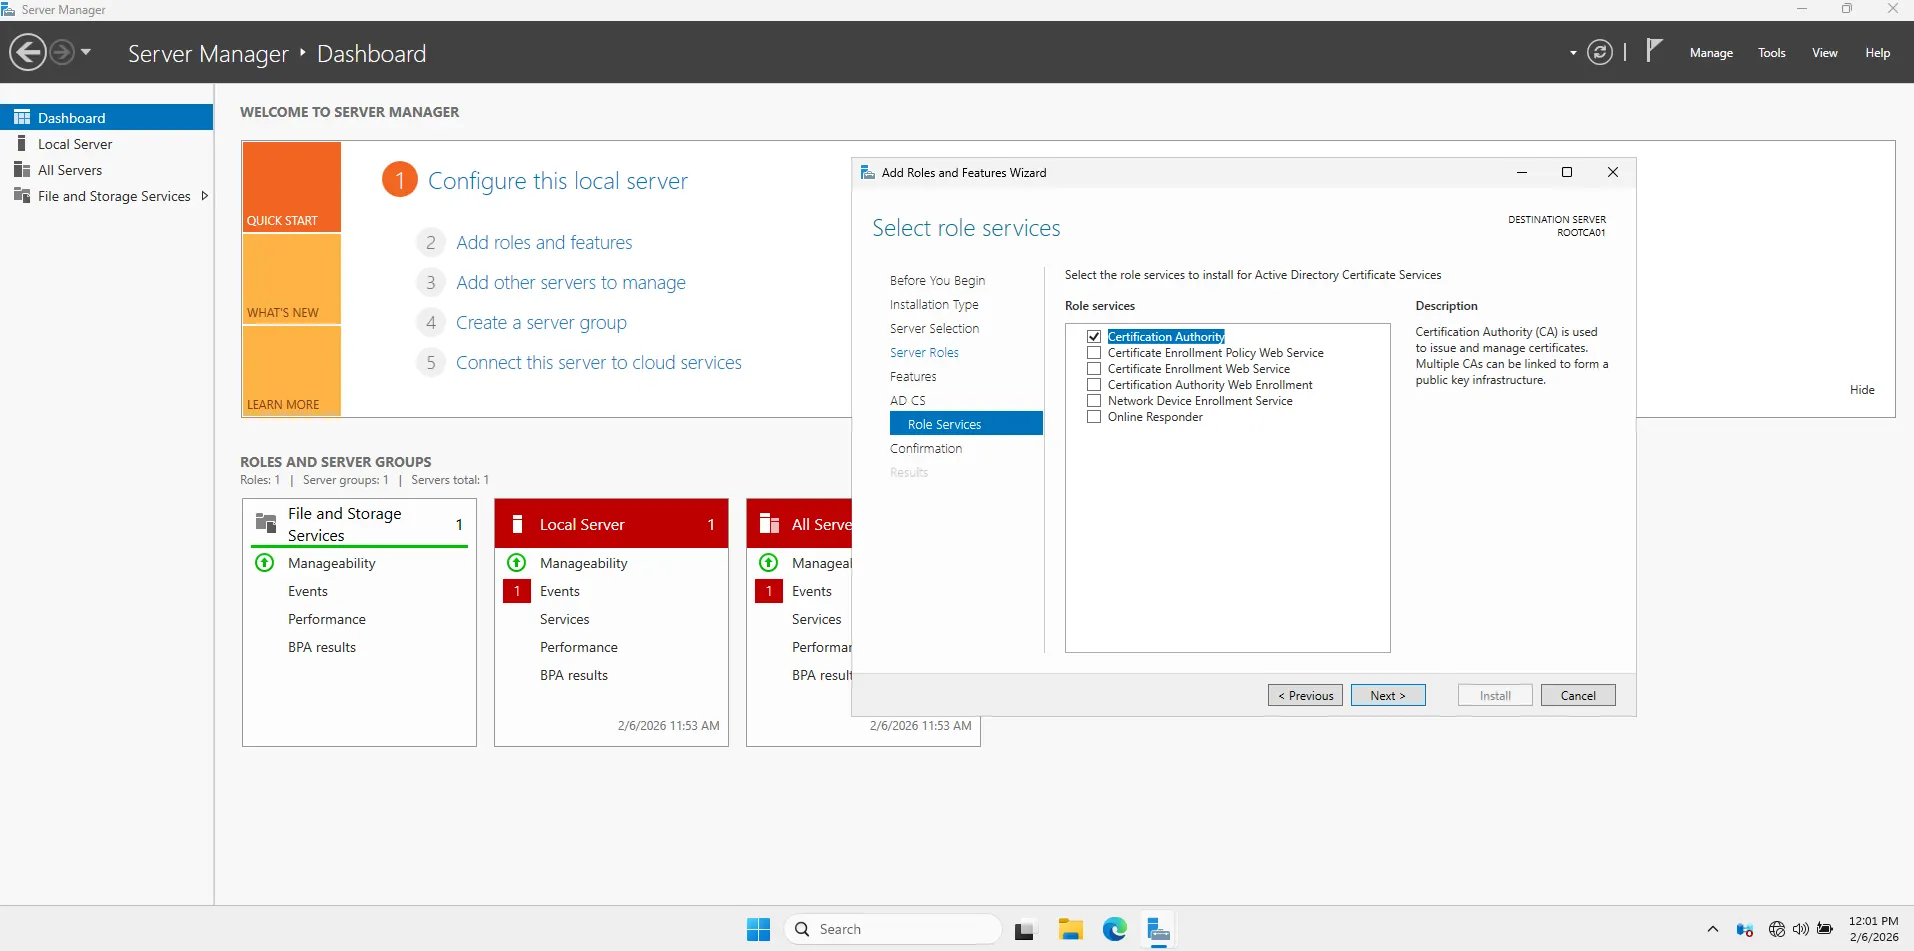
- Click Install.
-
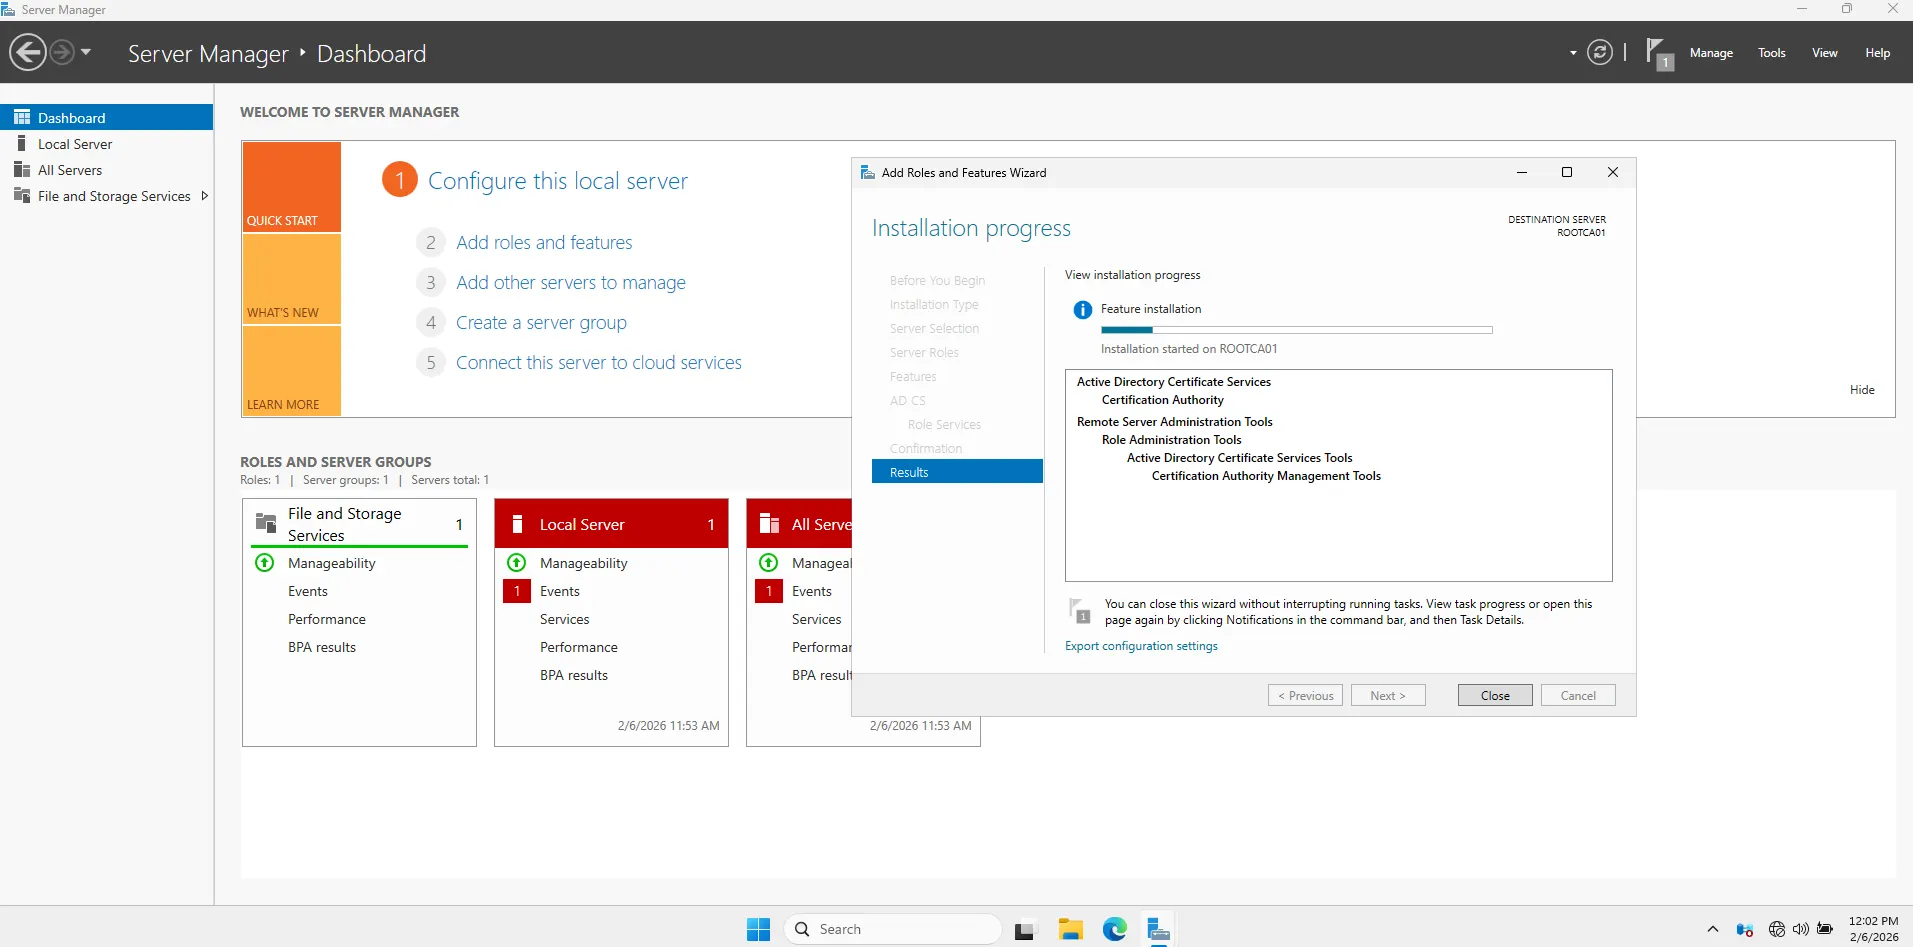
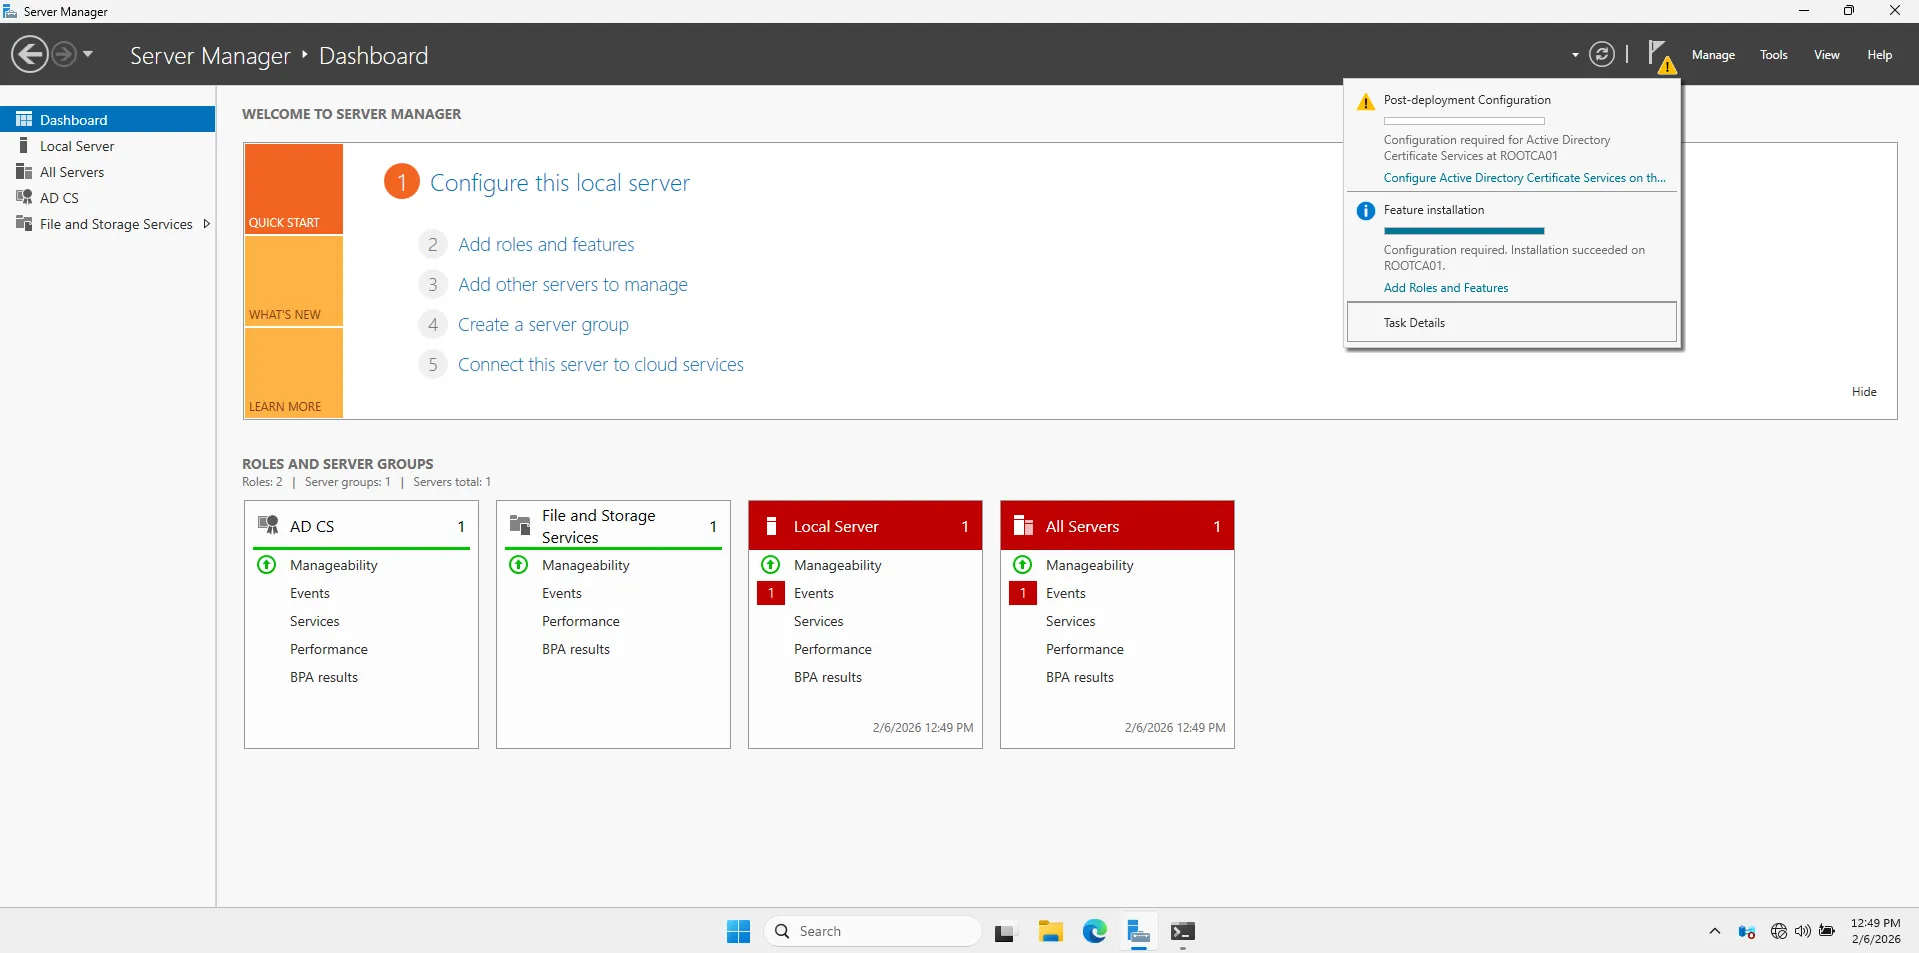
Once the installation bar finishes, you will see a **Yellow Flag ** notification at the top of Server Manager.
-
Click the Yellow Flag.
-
Click the blue link: “Configure Active Directory Certificate Services on the destination server”.
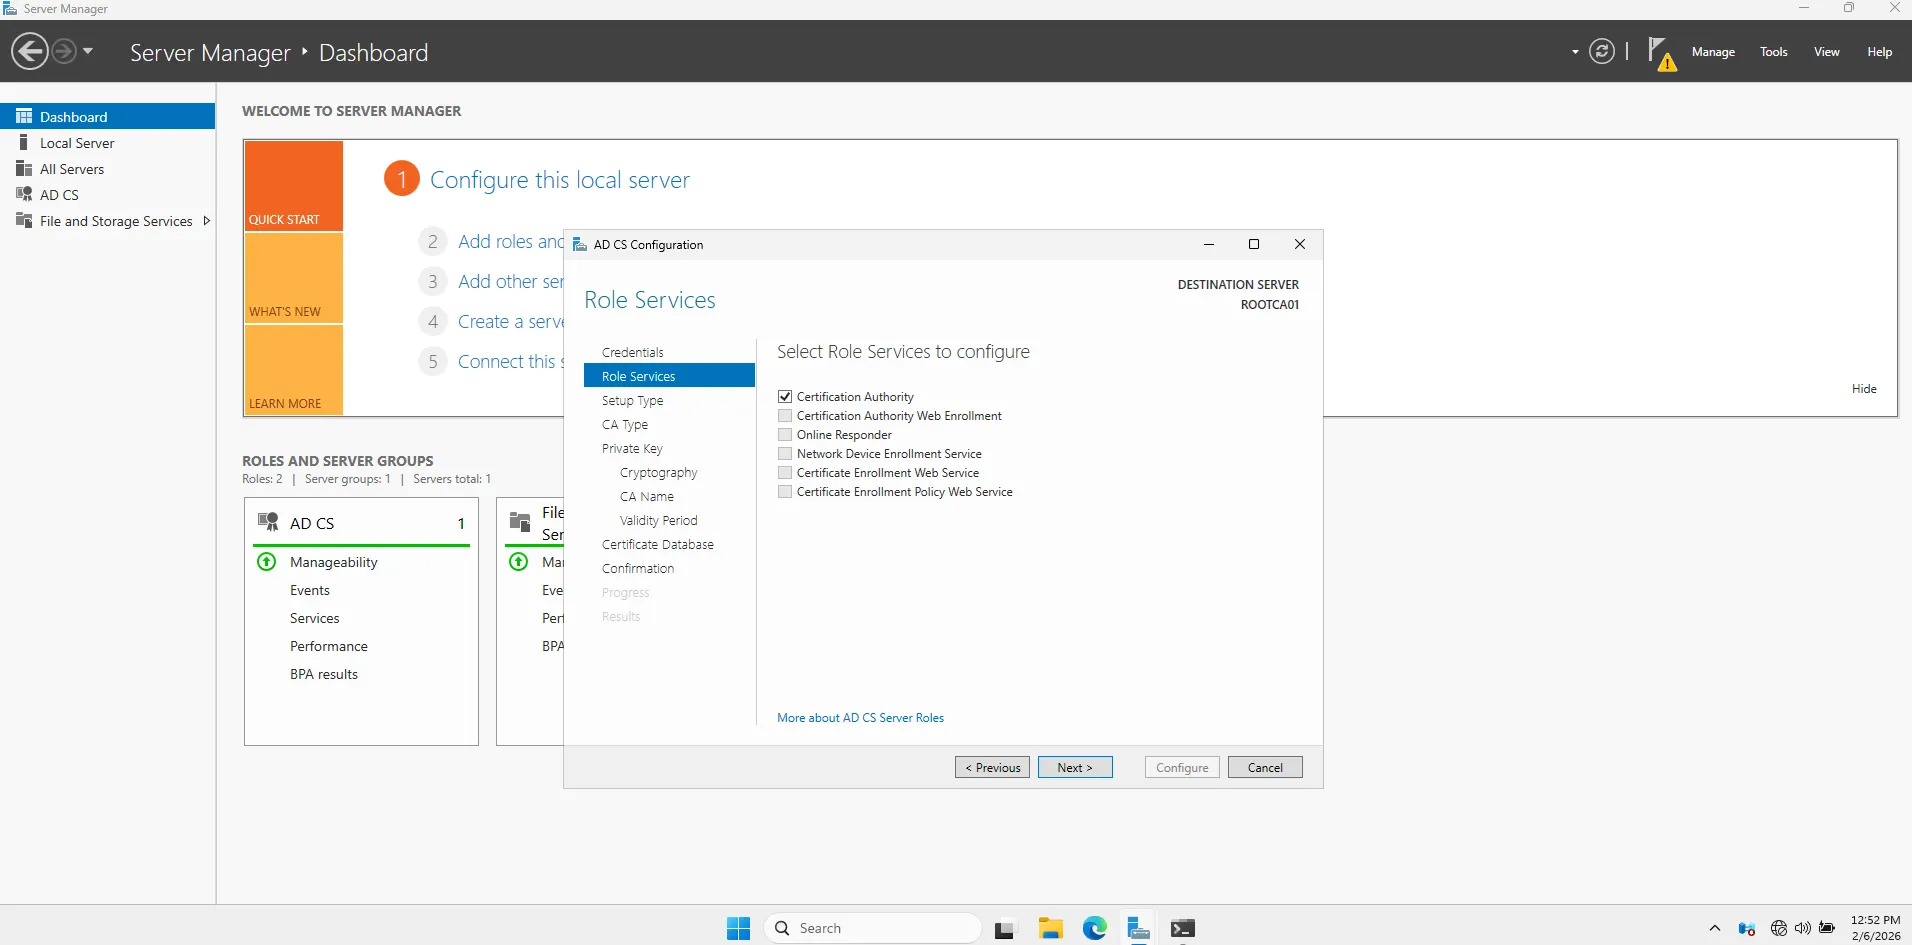
follow this “Bank Security” configuration profile exactly:
-
Credentials: Just click Next (using local Administrator).
-
Role Services: Check Certification Authority > Next.
-
Setup Type:
-
Select Standalone CA.
-
Why? Because this server is NOT in the domain. It is an offline island.
-
Click Next.

-
-
CA Type: Select Root CA > Next.
-
Private Key: Select Create a new private key > Next.
-
Cryptography:
-
Key length: Change
2048to4096. (We want this key to be unbreakable). -
Hash algorithm: SHA256 (Standard).
-
Click Next.

-
-
CA Name:
-
Common name: Change this to
Bank Root CA. -
This is the name users will see in their certificates.
-
Click Next.

-
-
Validity Period:
-
Change
5 Yearsto20 Years. -
Why? Root CAs are a pain to replace. You want this to last a long time.
-
Click Next.
-
-
Database: Leave defaults > Next.
-
Confirmation: Click Configure.

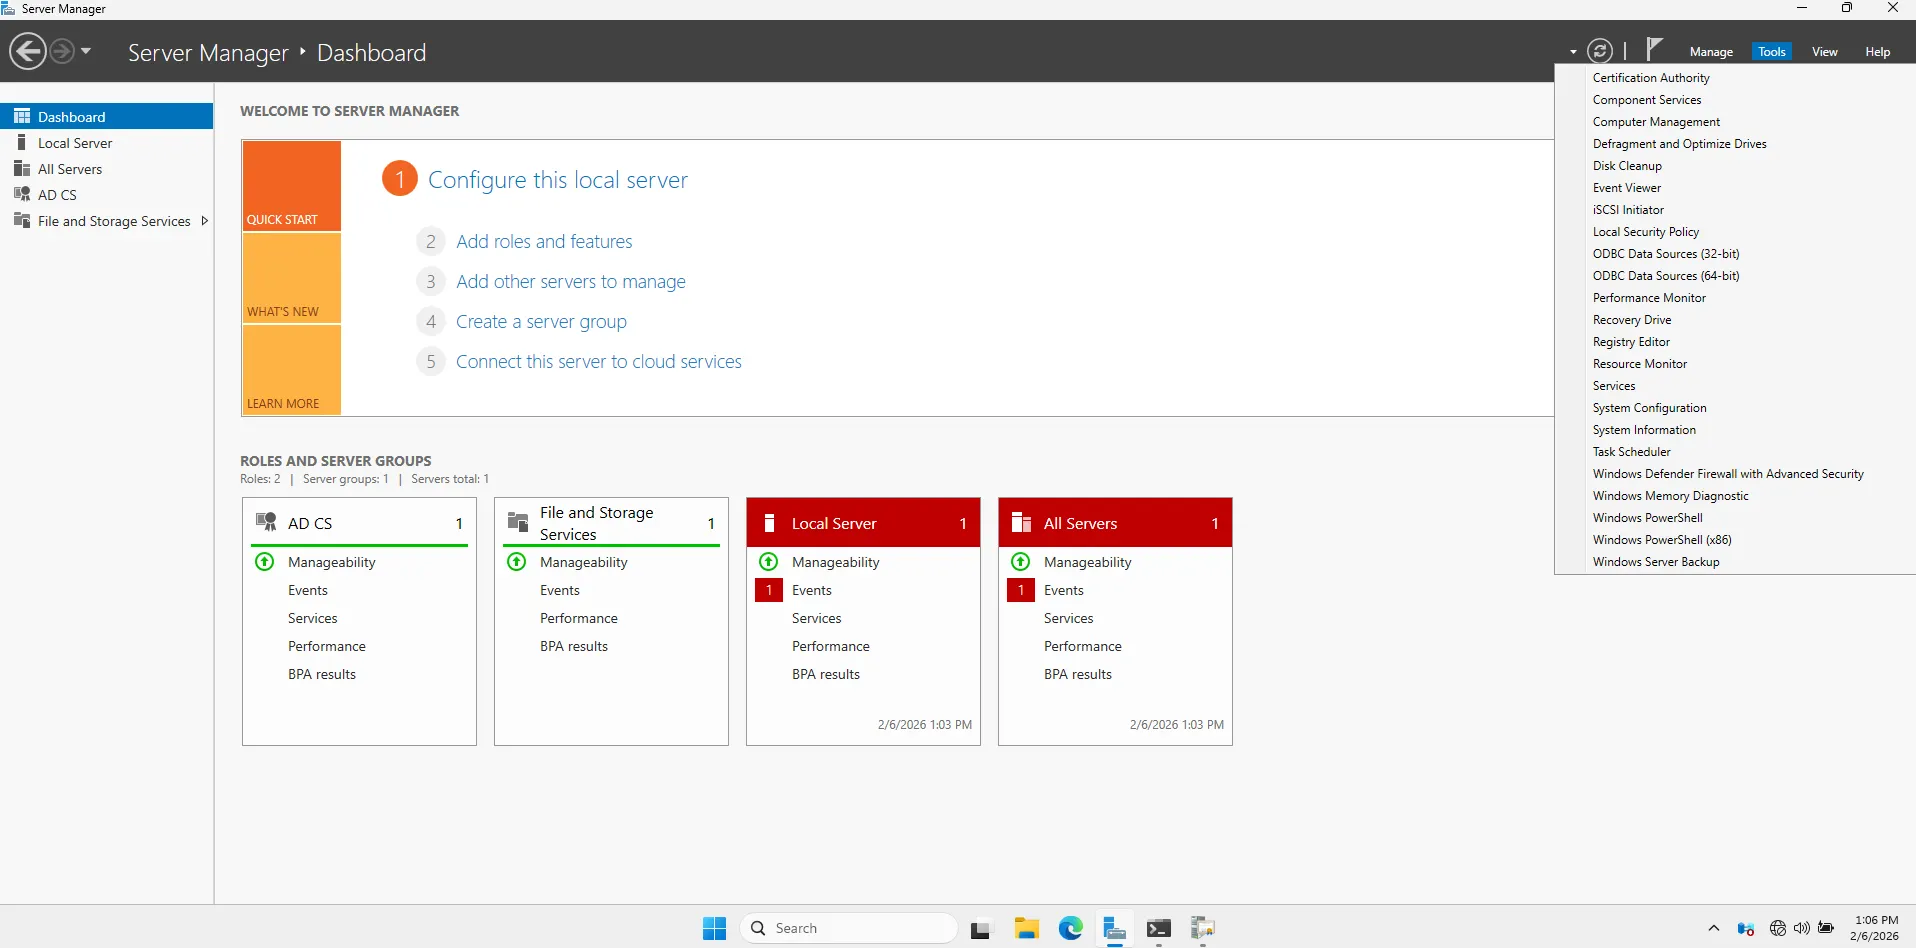
To verify your new Root CA is alive:
-
Click Tools (top right of Server Manager).
-
Select Certification Authority.
-
You should see a green checkmark next to Bank Root CA.

Configure CDP and AIA Extensions
Open Properties
-
Right-click Bank Root CA (in the Certification Authority console).
-
Select Properties.
-
Click the Extensions tab.
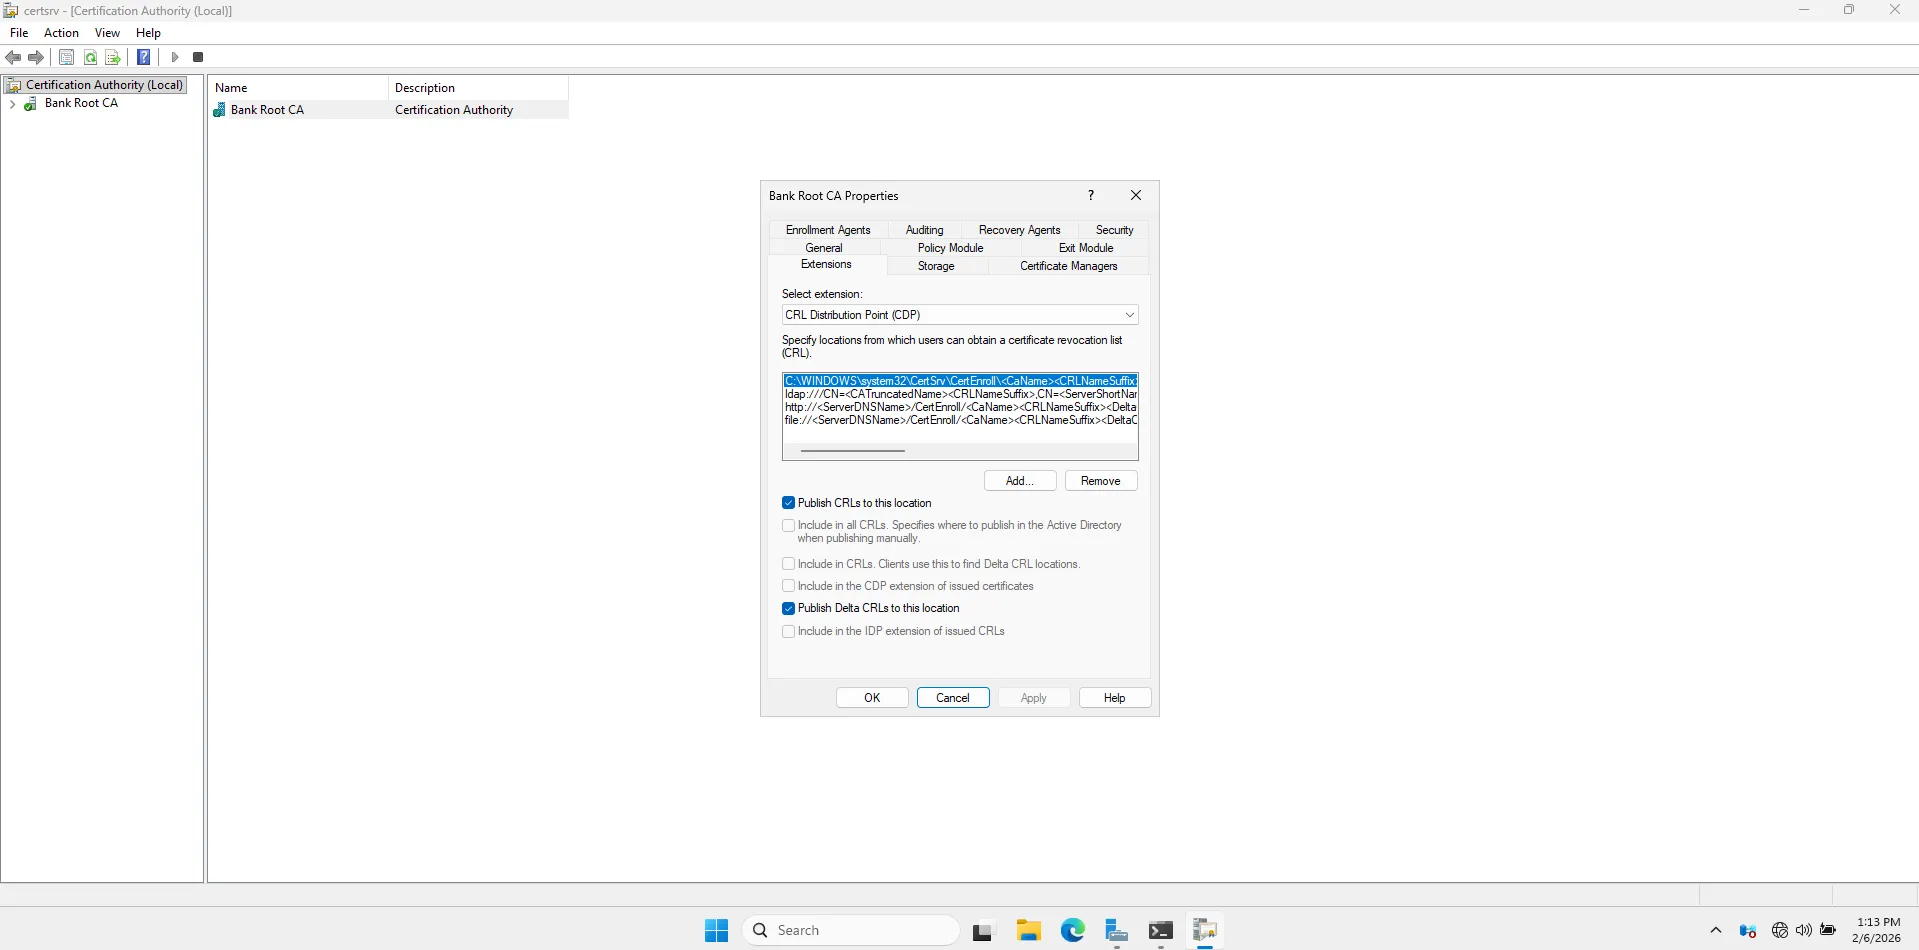
Configure CDP (CRL Distribution Point)
Ensure Select extension: is set to CRL Distribution Point (CDP).
-
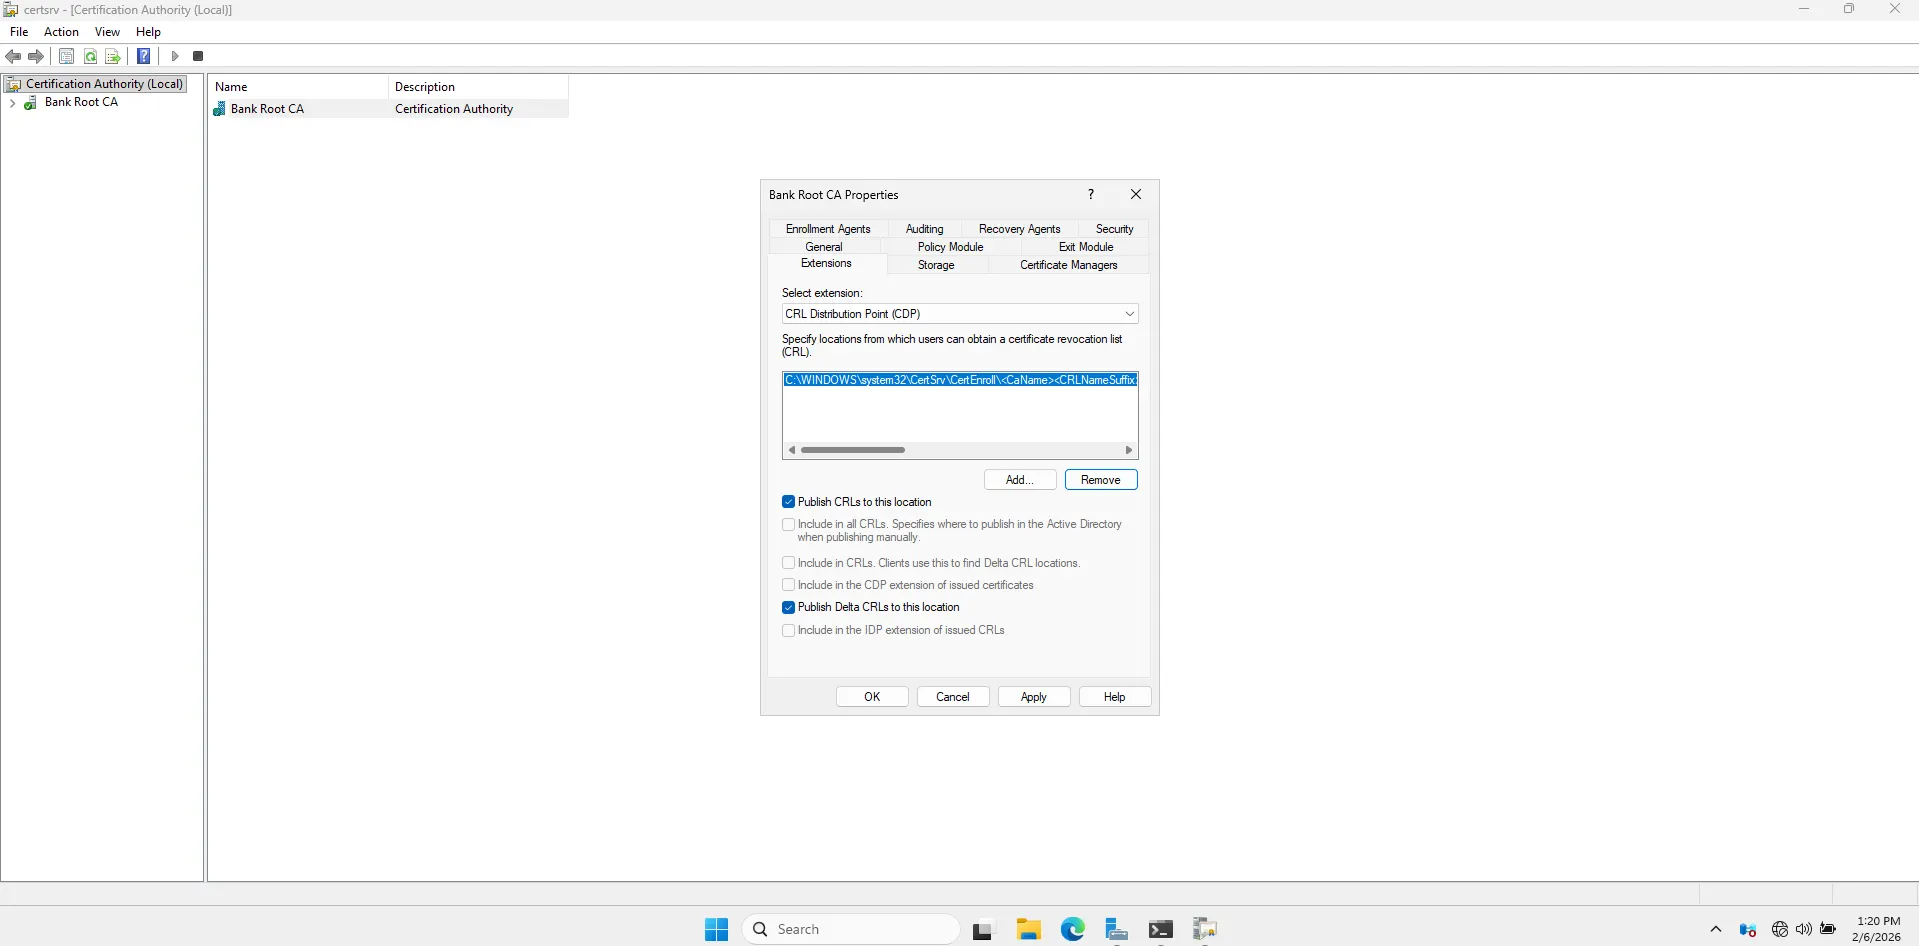
Clean up: Remove all the existing entries EXCEPT the one that starts with
C:\Windows\System32.... (Keep that one it’s where the file is created locally).- Select an entry -> Click Remove -> Yes.
-
Add the “Future” Web Path:
-
Click Add…
-
In the bottom box, type this exact URL (Case sensitive!):
http://pki.bank.lab/CertEnroll/<CaName><CRLNameSuffix><DeltaCRLAllowed>.crl -
Tip: You can type the
http://...part and then use the “Insert” button to add the<variables>. Or just copy-paste carefully. -
Click OK.
- Set Permissions (Crucial):
-
Highlight the new HTTP URL you just added.
-
Check these two boxes at the bottom:
-
Include in the CDP extension of issued certificates
-
Include in CRLs. Clients use this to find Delta CRL locations
-
- Uncheck everything else for this HTTP path.
-

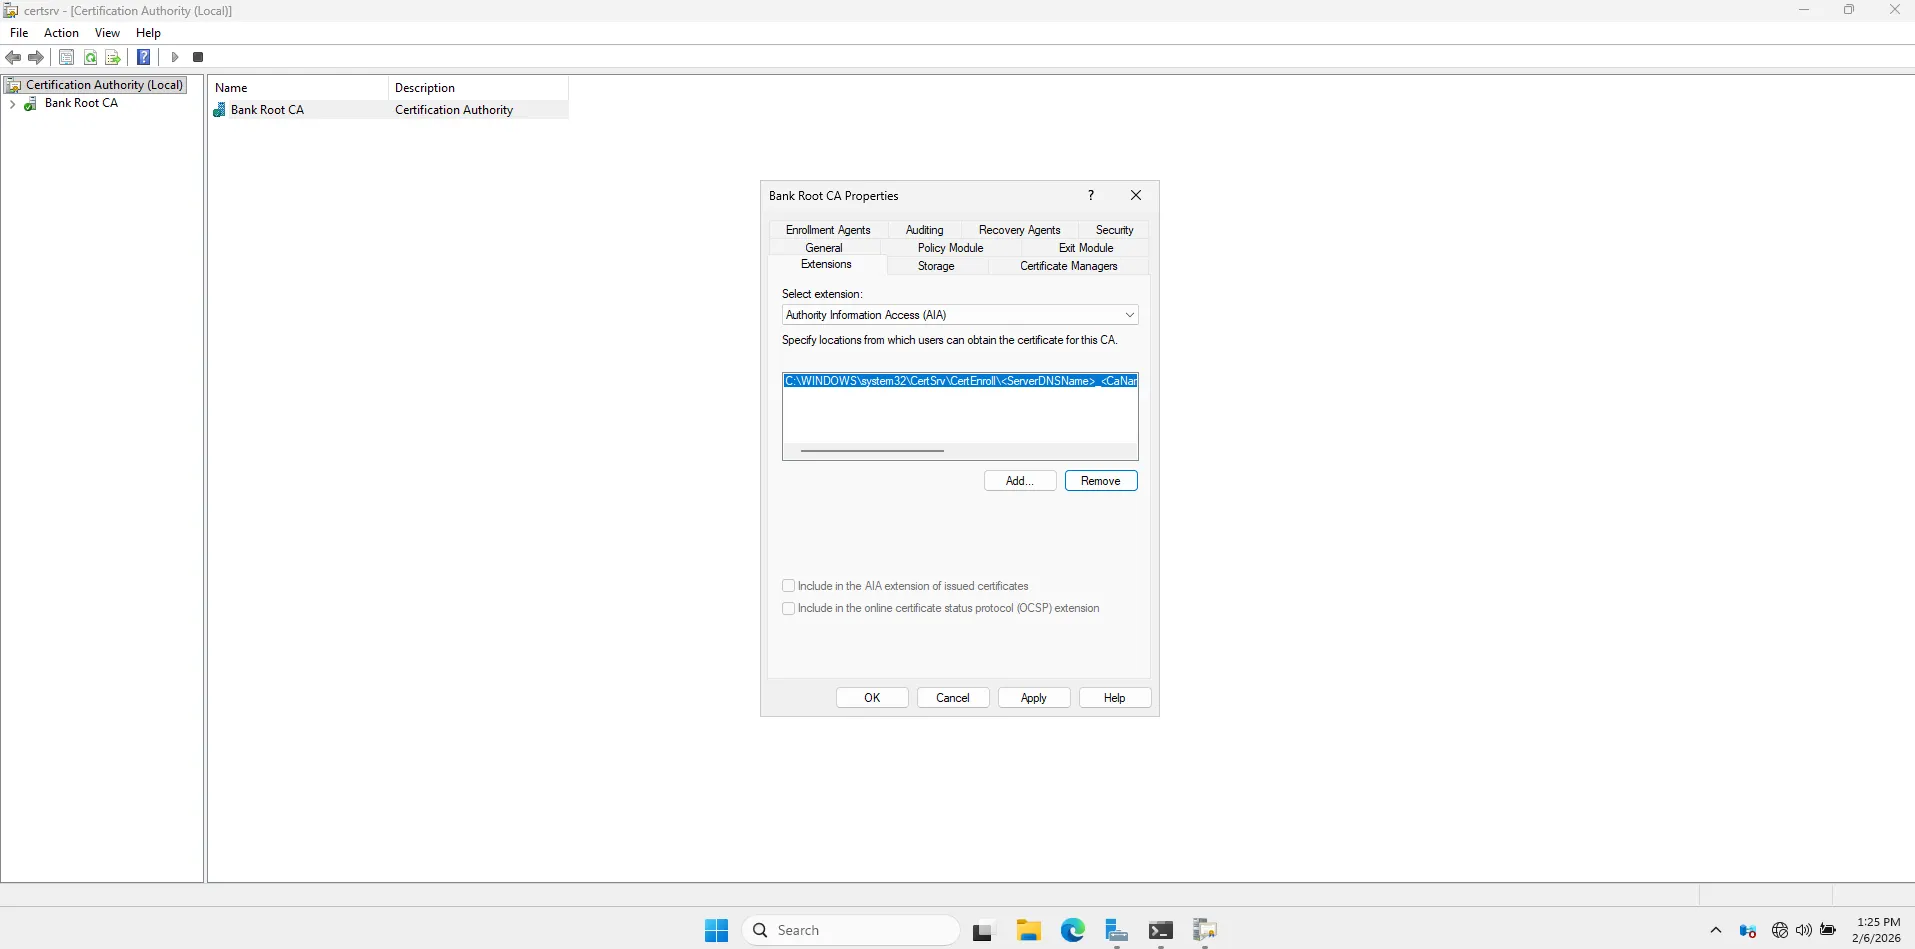
Configure AIA (Authority Information Access)
Change Select extension: to Authority Information Access (AIA).
- Clean up: Remove all entries EXCEPT the
C:\Windows\System32...one.
-
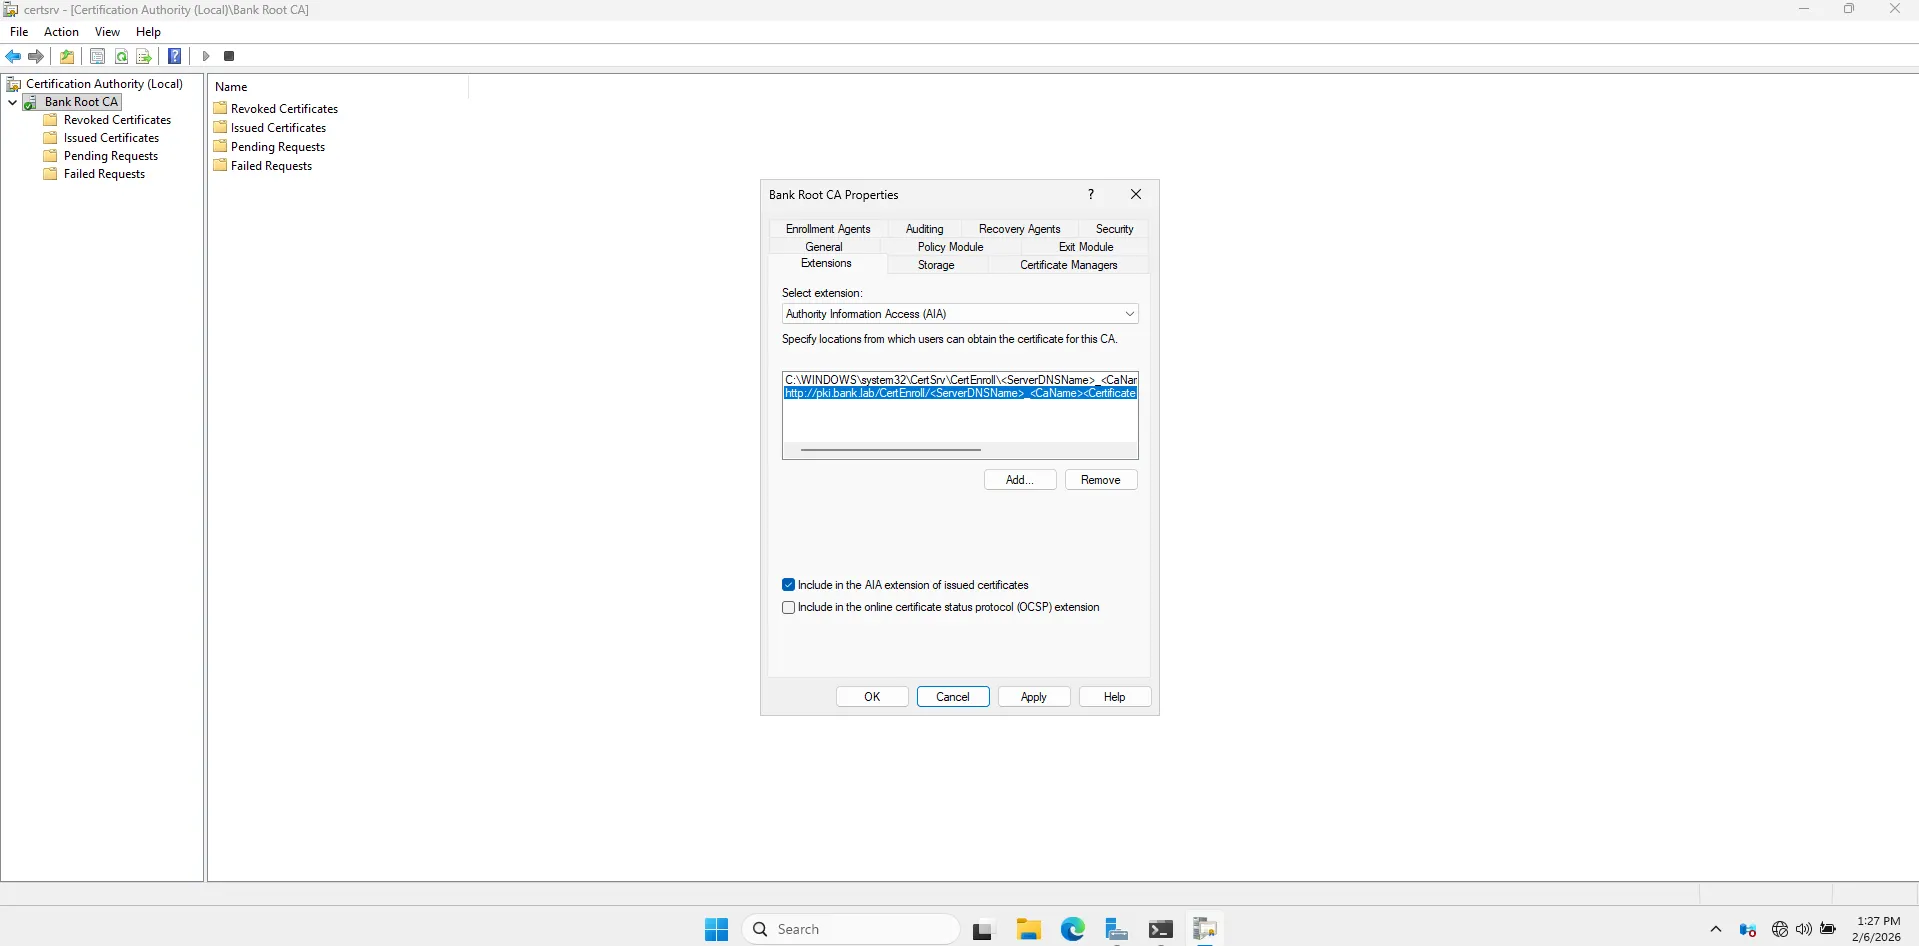
Add the Web Path:
-
Click Add…
-
Type this exact URL:
http://pki.bank.lab/CertEnroll/<ServerDNSName>_<CaName><CertificateName>.crt -
Click OK.
-
-
Set Permissions:
-
Highlight the new HTTP URL.
-
Check this box:
- Include in the AIA extension of issued certificates
-
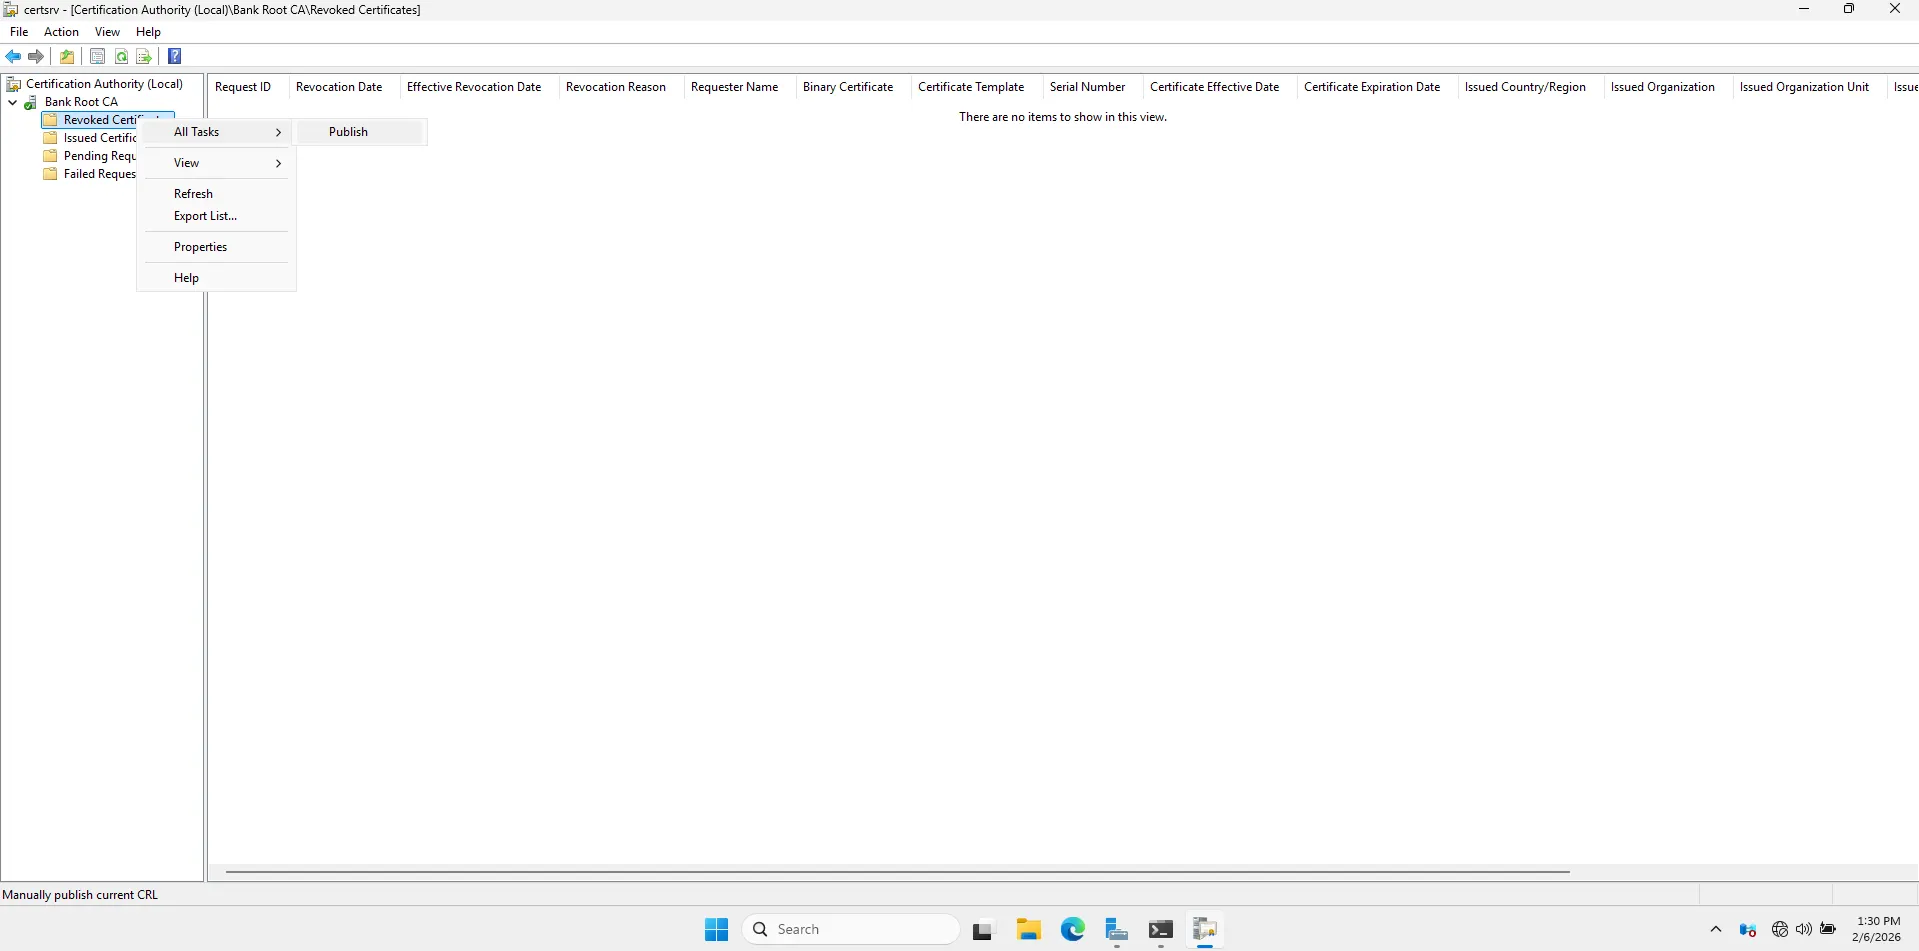
Publish the First CRL
Now that the configuration knows where to send people, we need to generate the “Blacklist” file (CRL) that contains these new instructions.
-
In the console, expand Bank Root CA.
-
Right-click the folder Revoked Certificates.
-
Select All Tasks > Publish.
-
Select New CRL > OK.
-

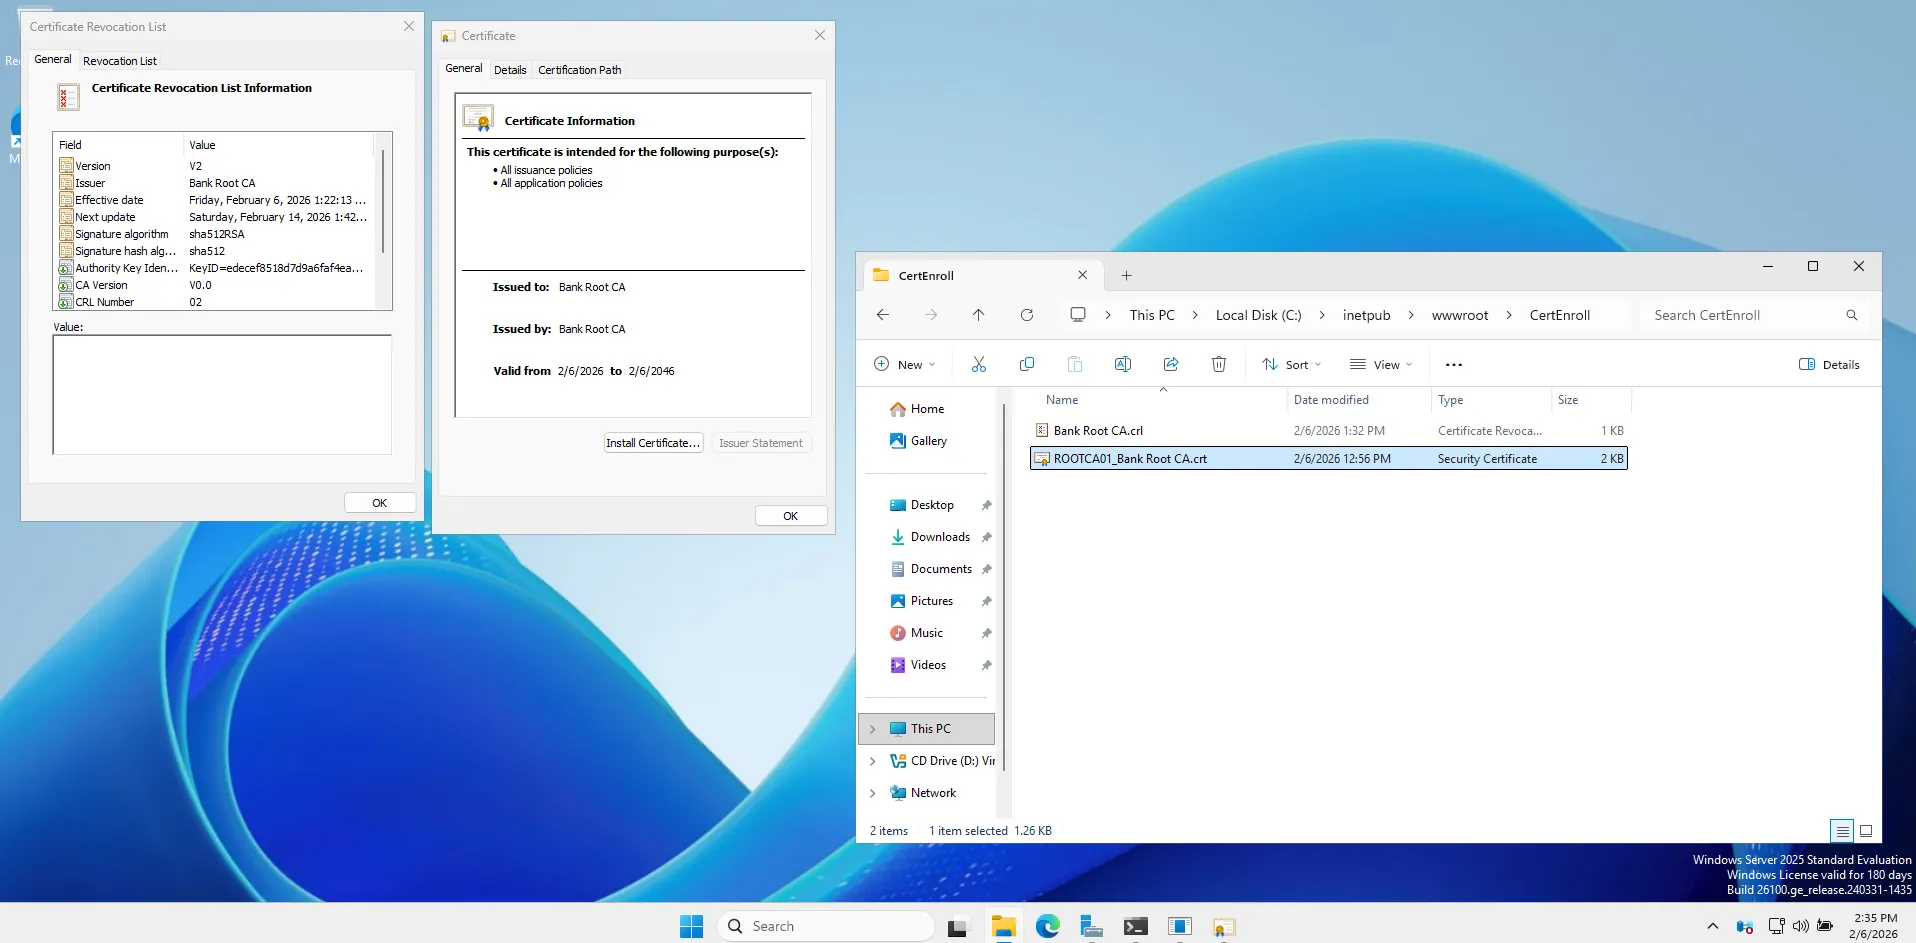
Go to file explorer C:\Windows\System32\CertSrv\CertEnroll. You should see two files:
-
A
.crlfile (The revocation list). -
A
.crtfile (The root certificate itself).

Now we have to transport those two files (.crt and .crl) from your isolated Root CA to the Domain Controller (DC01) so the rest of the network can trust them.
In a real bank, you would copy these to a rigorously scanned USB drive. In our lab, since the cable is still “plugged in” (virtually), we will use the network for a quick transfer before we sever the connection forever.
Transferring Files
Prepare the Destination (On DC01)
-
Switch to your DC01 virtual machine.
-
Log in as
BANK\Administrator. -
Open File Explorer and go to This PC > Local Disk (C:).
-
Right-click in the empty space > New > Folder.
-
Name it:
PKI.- (This will be our staging folder for all certificate files).

Copy the Files (From ROOTCA01)
-
Switch back to ROOTCA01.
-
Make sure you are looking at the folder with the 2 files (
C:\Windows\System32\CertSrv\CertEnroll). -
In the file explorer address bar at the top, type this path and press Enter:
\\192.168.10.10\c$- (This tells the Root CA to talk to the DC’s C: drive).
-
Authentication: It will ask for a username/password.
-
Username:
BANK\Administrator -
Password:
BankLab1!
-
-
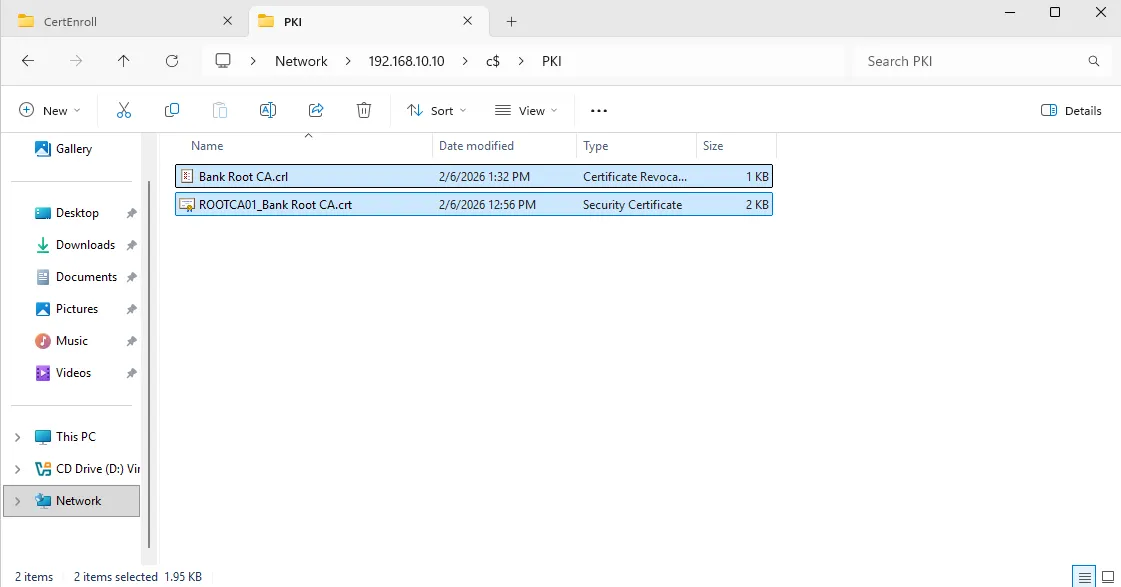
Open the
PKIfolder you just created. -
Copy/Paste: Drag and drop the
.crt(Certificate) and.crl(Revocation List) files from the ROOTCA01 folder into this PKI folder.
Go Offline (The “Air Gap”)
Now that the files are safely on the Domain Controller, ROOTCA01 has finished its job for now.
It’s time to simulate the security procedure of taking it offline.
-
On ROOTCA01, close all windows.
-
Click Start > Power > Shut Down.
-
Select Other (Planned) and click Continue.
-
The Root CA is now Offline. It will remain powered down and disconnected from the network until it is specifically needed to sign the Subordinate CA’s certificate request. This ensures that the master private keys are physically inaccessible to online attackers.
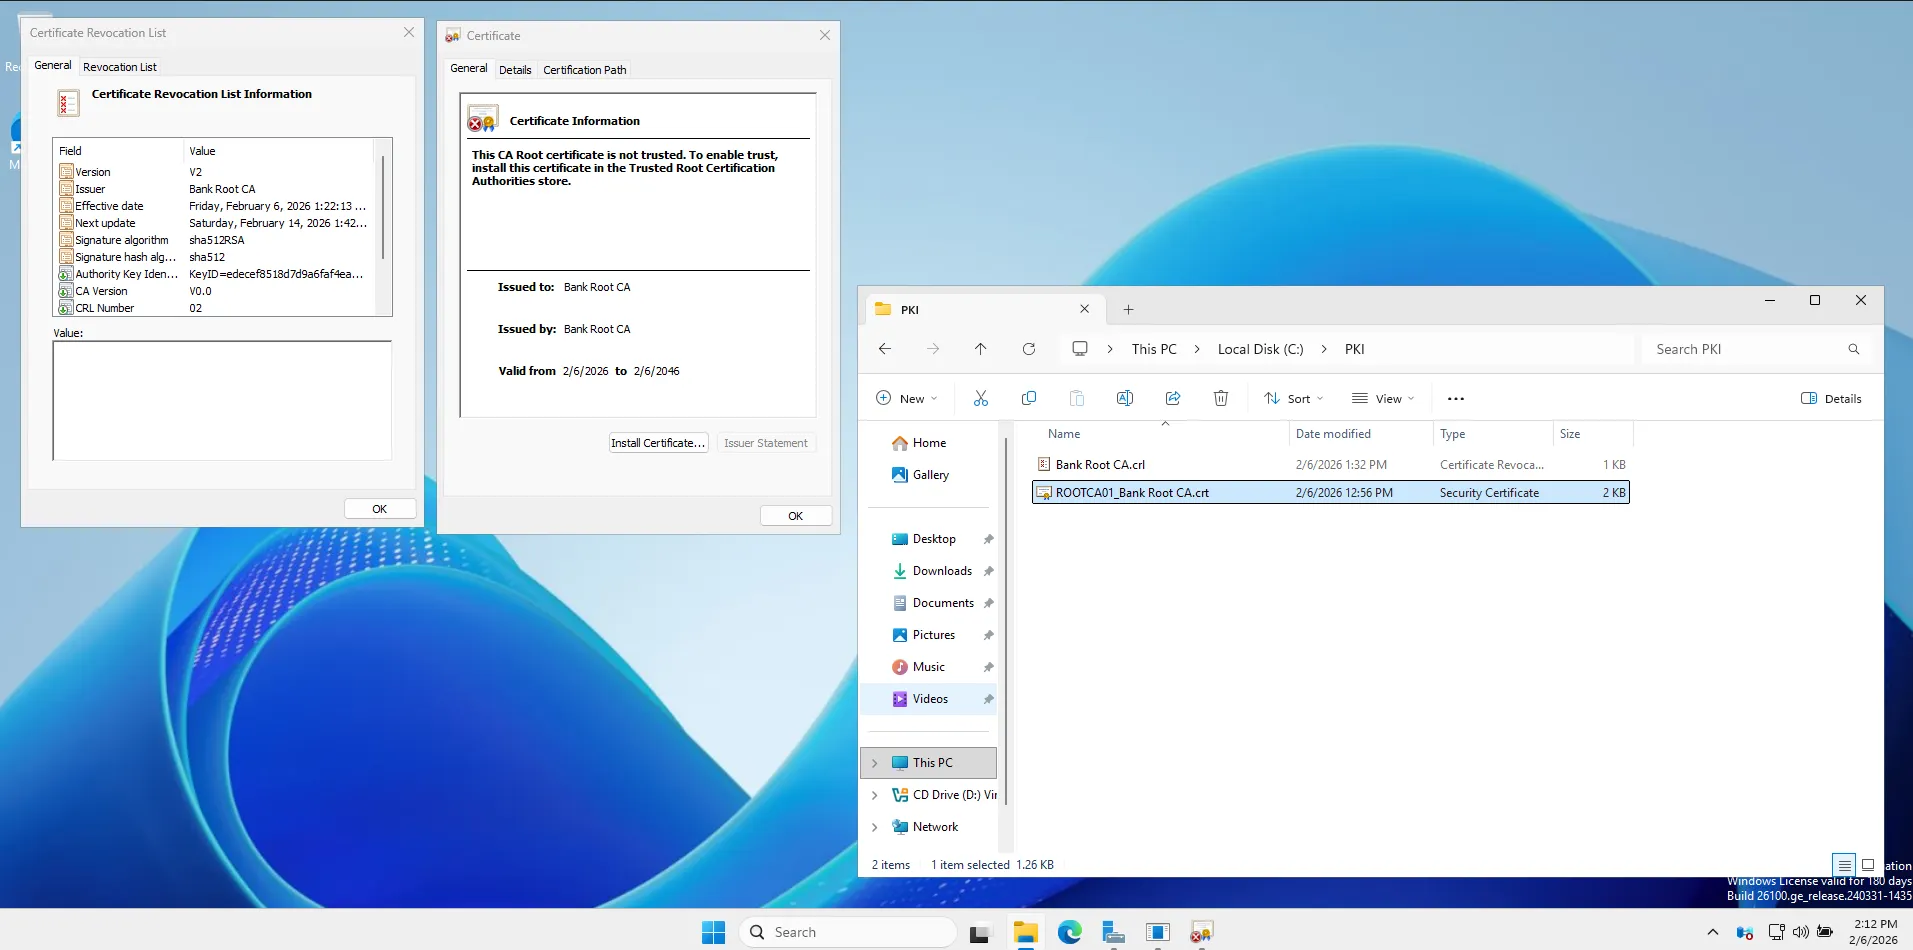
Trust Test
We are going to verify if your server trusts the certificate yet.
**1. The “Before” Check **
-
Go to your folder
C:\PKI. -
Double-click on
Bank Root CA.crt. -
Look at the General tab.
-
You will likely see a Red Cross and a message saying:
“This CA Root certificate is not trusted. To enable trust, install this certificate in the Trusted Root Certification Authorities store.”
Publish the Trust to Active Directory
Perform these steps on DC01 (logged in as BANK\Administrator).
1. Open PowerShell (Admin)
- Right-click Start > Windows PowerShell (Admin).
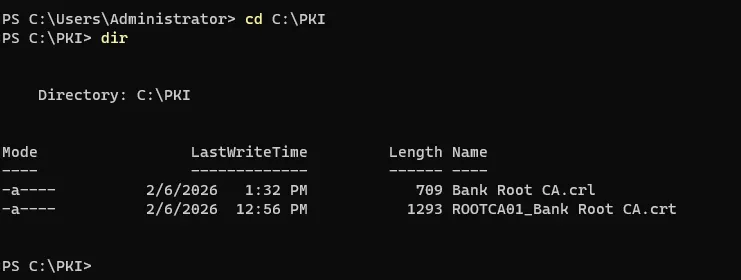
2. Navigate to your PKI folder Type this command and press Enter:
cd C:\PKI
3. Check the filenames Type ls or dir to see exactly what your files are named. They are likely something like Bank Root CA.crt and Bank Root CA.crl. (If they are named differently, update the commands below to match exactly).
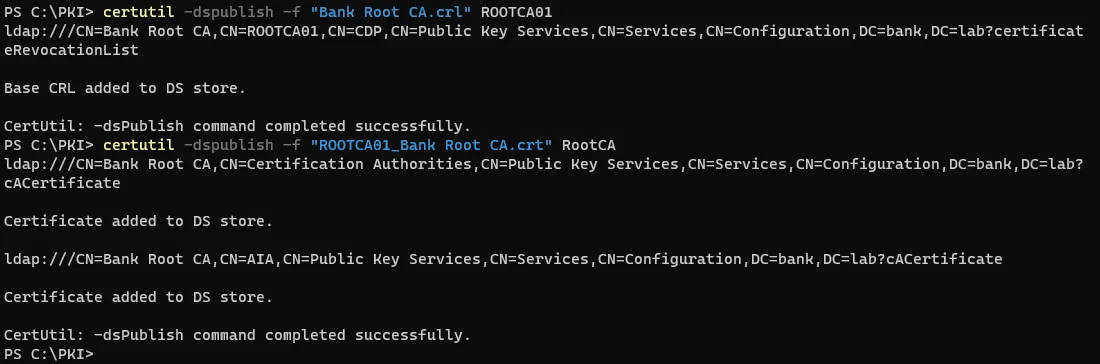
4. Publish the Root Certificate we have to manually tell Active Directory which server this belongs to. We do this by adding the Server Name (ROOTCA01) to the end of the command.
certutil -dspublish -f "Bank Root CA.crl" ROOTCA01
Note the ROOTCA01 at the end. This tells AD: “Put this in the container for the server named ROOTCA01”.)
Publish the Root Certificate
certutil -dspublish -f "ROOTCA01_Bank Root CA.crt" RootCA
Install the Web Server (IIS)
Now we need to turn DC01 into a web server so it can host the files for the URLs we configured (http://pki.bank.lab/…).
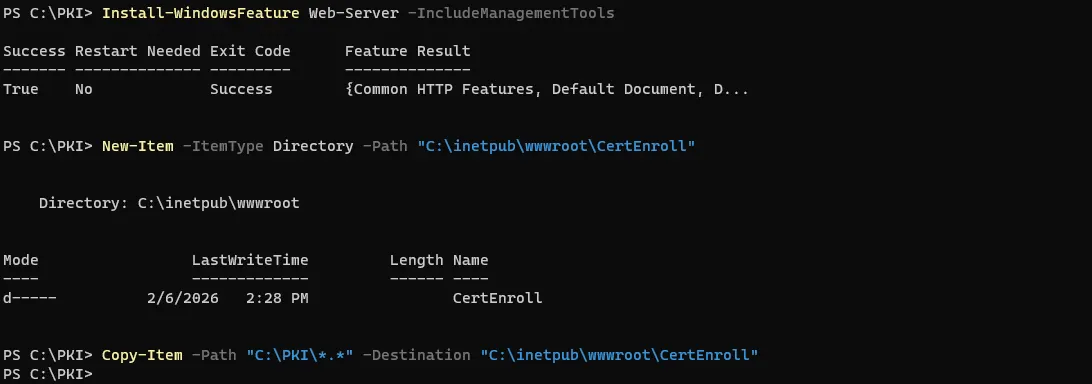
Install-WindowsFeature Web-Server -IncludeManagementTools
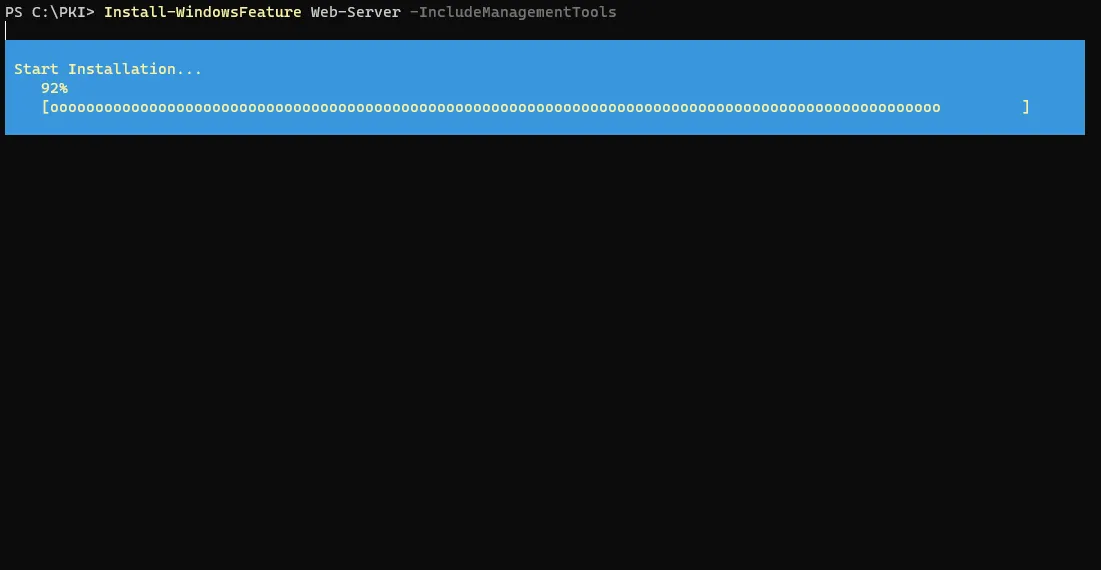
It might take a minute.
Create the “CertEnroll” Folder
Once IIS is installed, we need to create the specific folder where the certificates will live and copy your files into it.
New-Item -ItemType Directory -Path "C:\inetpub\wwwroot\CertEnroll"
Copy the files
Copy-Item -Path "C:\PKI\*.*" -Destination "C:\inetpub\wwwroot\CertEnroll"
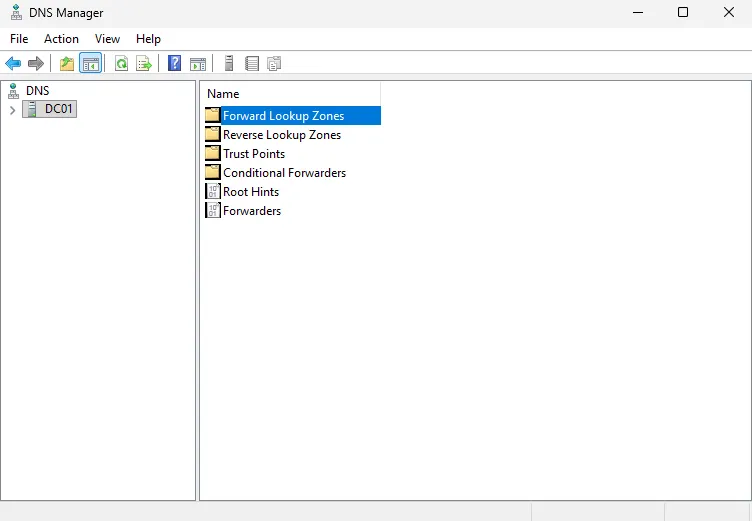
Create the DNS Record (On DC01)
-
Open Server Manager.
-
Click Tools > DNS.
-
Expand DC01 > Forward Lookup Zones.
-
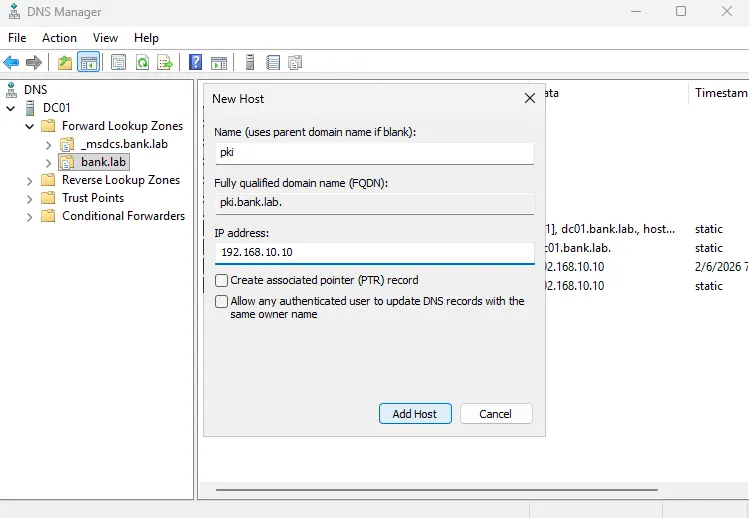
Click on the folder
bank.lab. -
Right-click in the empty white space on the right > New Host (A or AAAA)…

-
Name: Type
pki. -
(Notice the “Fully qualified domain name” box automatically fills in
pki.bank.lab).- IP address: Type
192.168.10.10.
- IP address: Type
-
Click Add Host.
-
You should see a message: “The host record pki.bank.lab was successfully created.”
- Click OK and then Done.
-
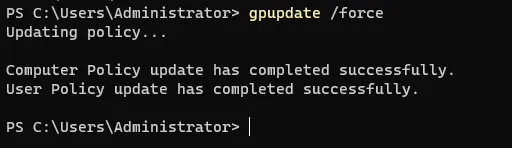
Now that DNS works and AD is updated, let’s see if your Domain Controller finally trusts the Root CA.
Force Update: Open PowerShell and run:
gpupdate /force
Check the Certificate:
-
Go to
C:\PKI. -
Open
ROOTCA01_Bank Root CA.crt. -
Look at the General Tab.
(Final Verification)
Go to http://pki.bank.lab/ to check if I am valid. Let’s make sure that link actually works.
On DC01, open the Microsoft Edge browser.
The Result:
If it downloads a file (or asks to save the ‘Bank Root CA.crl’ file), we are all set.
This proves that DNS resolved pki.bank.lab -> IIS received the request -> and served the file correctly.
that successful download actually proves:
-
DNS is working: Your computer asked for
pkiand found the Domain Controller.-
IIS is working: The web server received the request and knew exactly where the file was.
-
Permissions are correct: The server allowed you to take the file.
-

What’s Next: Part 2
With the “Trust Anchor” (Root CA) firmly established and secured offline, the foundation is laid. However, a Root CA should never issue certificates directly to end-users.
In Part 2, I will build the operational layer of this infrastructure: the Enterprise Subordinate CA (SUBCA01).
-
Domain Integration: Unlike the Root, this server will join the
bank.labdomain. -
The Signing Ceremony: I will bring the Root CA back online temporarily to sign the Subordinate’s certificate request.
-
Issuance: We will configure this new server to automatically issue certificates to users and computers.
Stay tuned as we turn this “Chain of Trust” into a fully functional banking security service.